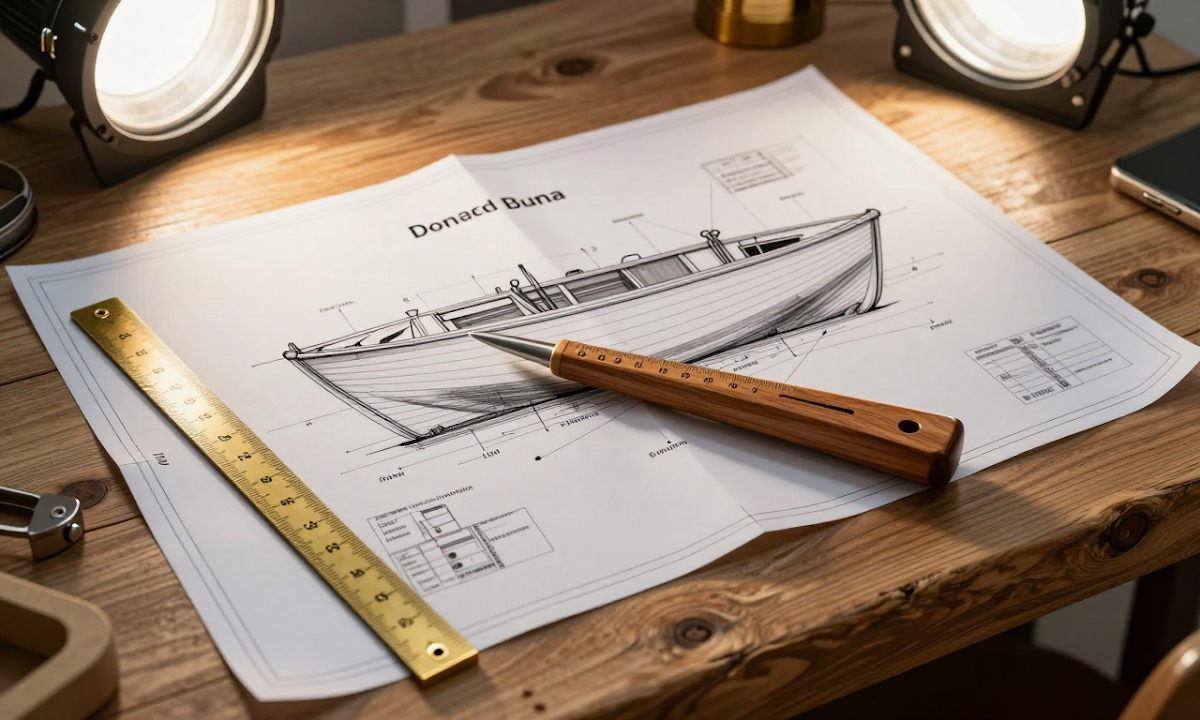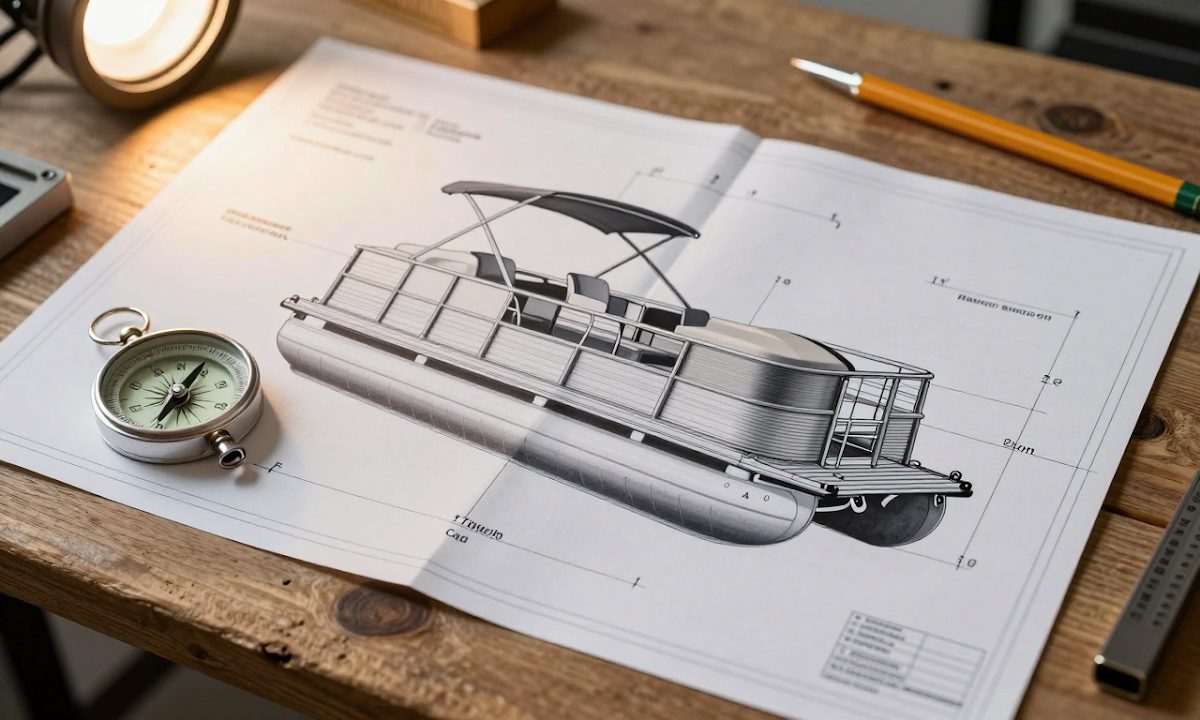
Pontoon Boat Plans for DIY Builders and Designers

Understanding Pontoon Boat Plans

Finding the right pontoon boat plans is often the first step toward transforming a simple vision of lake life into a tangible reality on the water. For many enthusiasts, the challenge lies in deciding whether to purchase a pre-made vessel or to take the rewarding path of building one from scratch. Starting a project without a clear roadmap can lead to wasted materials and structural inconsistencies that are difficult to correct later.

You will learn about the essential components of high-quality boat blueprints, from hull geometry to deck configurations. We will also explore how to select durable materials, walk through a logical construction sequence, and highlight common design mistakes that many first-time builders encounter along the way.

In this article:

Understanding Pontoon Boat Plans

Good pontoon boat plans serve as the architectural foundation for your project, translating a conceptual vision into a tangible set of instructions. A high-quality plan does more than just show you what the finished boat will look like; it provides the specific dimensions, angles, and measurements required to ensure structural integrity and functionality. For DIY builders, these plans bridge the gap between a rough sketch and a seaworthy vessel by accounting for buoyancy, weight distribution, and hydrodynamics.

A comprehensive set of pontoon boat plans should include detailed technical drawings that specify the layout of the logs (the pontoons), the deck structure, and the seating arrangements. It must also clarify the relationship between the frame and the hull, ensuring that every component fits together seamlessly during the assembly phase.

Types of Design Plans

When looking for pontoon boat plans, builders generally choose between three primary styles depending on their experience level and goals:

  • Step-by-Step Construction Plans: These are ideal for beginners who want a guided experience. They break the build down into chronological phases, providing clear instructions for every task from the first frame weld to the final upholstery finish.
  • Blueprints and Technical Drawings: These are more detailed, 2D representations of the boat's geometry. They are often preferred by designers who want a precise "map" to follow while they decide on specific aesthetic choices.
  • Custom Layout Plans: For those who prioritize functionality, these plans focus on the interior configuration. They allow you to choose between different configurations like fishing-focused setups, lounge areas, or dining spaces.

Choosing the right type of plan depends on how much creative control you want over the process. While a pre-designed set provides a proven "recipe" for success, a custom layout gives you the freedom to tailor the boat to your specific needs.

Essential Components of Boat Blueprints

High-quality pontoon boat plans provide the roadmap required to transform raw materials into a functional vessel. Unlike general sketches, professional blueprints offer precise measurements that ensure structural integrity and aesthetic balance across every stage of the build.

Hull Dimensions and Geometry

The foundation of any DIY pontoon design lies in the hull dimensions. These plans specify the overall length, width (beam), and depth of the pontoons to ensure they provide sufficient buoyancy and stability.

  • The blueprints define the diameter of each pontoon tube, which dictates how much water the boat can displace.
  • Length measurements include both the total deck length and the actual length of the submerged tubes to help determine the "overhang" at the bow and stern.
  • Width measurements guide the spacing between pontoons, influencing the overall footprint of the boat on the water.

Deck Layouts and Spatial Planning

A custom pontoon layout translates the open space above the tubes into usable areas for passengers and gear. These plans help builders visualize how to organize seating, storage, and movement.

  • The plans detail the placement of the main seating areas, such as the bow lounge or the aft bench.
  • They provide specific dimensions for the "walking space" between seats to ensure passengers can move freely without bumping into furniture.
  • Layouts also indicate where primary features like the helm station, dining tables, and cup holders will be positioned relative to the center of gravity.

Structural Measurements and Framework

To build a sturdy boat that survives waves and weight distribution, you need exact structural measurements for the "skeleton" of the craft.

  • Blueprints provide the dimensions for the front and rear caps, which connect the pontoons and give the boat its shape.
  • The plans specify the spacing for the aluminum or wood stringers that run the length of the deck to prevent sagging.
  • Cross-beams measurements ensure that the entire framework remains square and level during the assembly process.

Choosing Materials for Your Build

Selecting the right materials is a critical step when following pontoon boat plans, as your choice of substance determines the boat's durability, weight, and maintenance requirements. Most DIY builders must choose between three primary categories: aluminum, wood, and marine-grade fabrics, each offering distinct advantages depending on the complexity of the design.

Aluminum Framework

Aluminum is the industry standard for pontoon construction because it offers an excellent strength-to-weight ratio. When using pontoon boat plans that emphasize longevity, aluminum provides a corrosion-resistant skeleton that can withstand various water conditions with minimal upkeep.

  • Extruded aluminum is commonly used for the main logs to provide structural rigidity without adding excessive bulk.
  • Welded aluminum plates are ideal for creating custom deck shapes or unique bow designs in a DIY pontoon design project.
  • Aluminum allows for a modular build, making it easier to swap out sections if you decide to change your custom pontoon layout later.

Wood and Composite Decking

While aluminum provides the "bones," wood often provides the "soul" of the boat. Wood is frequently used for the decking and interior cabinetry, offering a warmer aesthetic and more variety in texture.

  • Teak or mahogany are premium choices for high-end builds, providing natural beauty and excellent slip resistance.
  • Pressure-treated pine serves as a cost-effective alternative for builders who want a traditional look without the higher price tag of hardwoods.
  • Composite decking is becoming increasingly popular because it combines the organic feel of wood with the durability of synthetic materials.

Marine-Grade Fabrics and Finishes

The final layer of your build involves the surfaces that interact directly with the passengers. Marine-grade fabrics are essential for upholstery, seating, and protective covers.

  • Sunbrella and similar acrylic fabrics are designed to resist UV rays and moisture, ensuring the colors do not fade quickly in the sun.
  • Vinyl is a durable, easy-to-clean option for bench seats that require frequent wiping down after a day on the water.
  • Marine plywood acts as a bridge between structural wood and finished surfaces, providing a stable base for mounting seats and tables.

Step by Step Construction Process

Building a pontoon boat from scratch requires a systematic approach to ensure structural integrity and aesthetic appeal. The construction process follows a logical progression from the skeletal foundation to the final decorative touches, ensuring that each layer supports the next correctly.

Establishing the Foundation

The first step in your DIY pontoon design is constructing the pontoons themselves or selecting high-quality pre-made ones. These act as the primary buoyancy chambers for the entire vessel. Once the pontoons are ready, you must establish the main frame, which connects the logs together.

  • Measure and cut the aluminum or timber beams to define the length and width of your deck.
  • Assemble the "logs" by connecting them with sturdy cross-beams to create a stable rectangular or oval base.
  • Install the center and side supports to ensure even weight distribution across the water surface.

Decking and Framework

With the frame secured, you move on to creating the flooring. This stage defines how much usable space your boat will have for passengers and furniture. You must decide whether to use traditional planks or a modern sheet material.

  • Lay down the floor joists at consistent intervals across the main frame.
  • Attach the decking material, such as marine-grade plywood, aluminum planks, or composite boards.
  • Ensure every plank is flush and securely fastened to prevent shifting during movement.

Seating and Structural Details

Once the floor is solid, it is time to integrate the functional elements of your custom pontoon layout. This includes the seating arrangements and any structural railings that provide safety for passengers.

  • Install the benches or chairs according to your desired configuration.
  • Mount the bow and stern seats to anchor the front and back of the boat.
  • Add side rails if you want a more traditional "catamaran" feel or extra handholds for stability.

Final Finishing Touches

The final phase involves aesthetics and functionality. This is where your build transforms from a structural project into a finished vessel ready for the water.

  • Install the motor mount at the stern, ensuring it is perfectly aligned with the centerline.
  • Add the console, helm, and steering system to manage navigation.
  • Apply the final finishes, including paint, stain, or upholstery on the seats and cushions.

Common Design Mistakes to Avoid

When starting your DIY pontoon project, recognizing common design mistakes early can save significant time and frustration during the construction phase. One of the most frequent errors involves failing to account for the "working space" within a custom pontoon layout. Builders often focus on the size of the deck but forget to leave enough room for people to move between seats or for passengers to access the center of the boat without bumping into one another.

Layout and Ergonomic Errors

A common pitfall in DIY pontoon design is placing heavy furniture or seating too close to the edges. This can make it difficult to navigate the interior, especially if you plan on having multiple people on board at once. It is also vital to consider the sightlines of your passengers; if the front row of seats is too high or large, it may block the view for those sitting behind them.

  • Neglecting to plan for a clear path to the motor or the helm can lead to awkward maneuvering during daily use.
  • Forgetting to include enough clearance between the bench seats and the railings can make the boat feel cramped rather than spacious.
  • Overcomplicating the layout with too many small features often results in a cluttered deck that lacks a clear focal point.

Structural Integrity and Balance

Another critical area where mistakes occur is in the distribution of weight across the pontoons. If your design places most of the heavy components, such as the engine or large storage bins, on one side without balancing them out, the boat may list to one side. Proper pontoon boat plans should ensure that the center of gravity remains balanced to provide a smooth ride.

  • Failing to choose pontoons with matching diameters and widths can cause an uneven buoyancy distribution across the frame.
  • Underestimating the weight of the deck material can lead to sagging in the middle of the boat if the underlying structure isn't reinforced enough.
  • Ignoring the "freeboard" height—the distance between the water line and the top of the deck—can result in a boat that takes on too much water when moving at higher speeds.

Frequently Asked Questions

How do I choose between a basic and complex pontoon boat plan?

Choosing the right pontoon boat plans depends on your construction experience and desired level of customization. A basic plan is ideal for DIY builders seeking a straightforward, functional layout with fewer moving parts. Conversely, a complex plan offers a more intricate custom pontoon layout, featuring specialized seating, integrated storage, and sophisticated aesthetics for those who want a unique, high-performance vessel.

Final Thoughts

Selecting the right pontoon boat plans is the foundation of a successful build, providing the structural clarity needed to transition from a conceptual design to a floating reality. By focusing on high-quality blueprints, choosing durable materials like aluminum or pressure-treated wood, and following a systematic construction process, you can create a vessel tailored specifically to your needs. Whether you prioritize a spacious custom pontoon layout or a streamlined DIY pontoon design, having a reliable plan reduces guesswork and ensures structural integrity.

Key Takeaways

  • Quality pontoon boat plans provide a clear roadmap for dimensions, structural balance, and component placement.
  • Choosing the right materials early ensures your build is both durable enough for the water and aesthetically pleasing.
  • A systematic step-by-step approach helps prevent common design mistakes like uneven buoyancy or poor deck flow.

To begin your journey toward building your own pontoon, take one small first step tonight by sketching out a rough layout of your desired deck space on a piece of paper.

Share:

Sailboat Plans Comparison: Pre-designed vs. Custom Tailored

sailboat plans comparison: Understanding sailboat plans types

Choosing between pre-designed boat plans and a custom tailored sailboat is one of the most significant decisions any builder faces at the start of their journey. Many aspiring sailors find themselves overwhelmed by the sheer variety of options, often wondering if they should stick to a proven blueprint or invest in a design uniquely suited to their specific lifestyle. This article provides a comprehensive sailboat plans comparison to help you navigate these two distinct paths.

You will learn about the practical benefits of pre-designed boat plans for those seeking efficiency and reliability, as well as the creative freedom offered by a custom tailored boat. Whether you want a ready to build boat or a bespoke yacht design process, understanding these differences is the first step toward your next adventure on the water.

In this article:

Understanding sailboat plans types

When embarking on a boating project, the first decision you must make is determining how much creative control versus convenience you want to exercise. A sailboat plans comparison begins with understanding the fundamental difference between pre-designed and custom tailored designs. Each approach offers a different path toward your finished vessel, depending on whether you prefer a proven blueprint or a unique masterpiece.

Pre-designed boat plans

Pre-designed boat plans are essentially "off-the-shelf" blueprints created by professional naval architects and released to the general public. These designs have already undergone rigorous testing, calculations, and refinements to ensure they perform reliably in various sea conditions.

  • These plans offer a standardized layout where every dimension, from the keel depth to the mast height, is predetermined.
  • They are ideal for builders who want a reliable "ready to build" experience without having to make hundreds of minor engineering decisions.
  • Because they are produced for multiple builders, these designs often feature optimized hull shapes and proven interior layouts that balance functionality with aesthetics.

Custom tailored sailboat

A custom tailored sailboat is a bespoke design created from the ground up to meet the specific needs, preferences, and constraints of a single owner. Instead of following a set template, you work with a designer to define every nuance of the boat.

  • The yacht design process for a custom build involves selecting specific hull shapes, interior configurations, and sail areas based on how you plan to use the boat.
  • Custom designs allow you to prioritize your personal "must-haves," such as an extra sleeping berth, a wider beam for better stability, or a specific aesthetic style.
  • While more complex, this approach ensures that the final vessel is perfectly suited to your specific sailing habits and storage requirements.

Benefits of pre-designed sailboat plans

Pre-designed sailboat plans provide a structured roadmap that allows builders to move from the drawing board to the water with greater efficiency. Because these designs have already been engineered and tested by naval architects, they eliminate much of the guesswork associated with boat building. For those who want a reliable vessel without the complexity of designing every curve and angle from scratch, pre-designed plans offer a sense of security and clarity.

Time Efficiency in Construction

One of the primary benefits of using ready to build boats is the significant reduction in planning time. When you choose a standard design, the fundamental geometry of the hull, keel, and mast are already finalized. This allows builders to focus their energy on construction rather than experimentation.

  • Builders can begin assembly immediately because every measurement and curve is predetermined by the designer.
  • Standard designs often come with detailed specifications for parts, reducing the need to make "on-the-fly" decisions during the build process.
  • Because these plans are frequently used by multiple builders, they have been refined over time to eliminate common construction bottlenecks.

Predictable Costs and Resources

Pre-designed boat plans offer a level of financial predictability that is often difficult to achieve with unique designs. Since the materials required are already calculated, you can estimate your total expenditure much earlier in the process.

  • Standardized dimensions allow for more efficient material purchasing, as designers optimize the hull shape to minimize waste from standard lumber or fiberglass sheets.
  • Because these plans are popular, many components (like standard mast sizes or keel shapes) are mass-produced, often making them cheaper than bespoke alternatives.
  • Predictable designs make it easier to create a realistic budget for labor and materials, preventing the "hidden costs" that frequently arise during complex custom modifications.

Proven Reliability

When you select a pre-designed plan, you are essentially benefiting from the collective experience of previous builders. These boats have been proven to perform well in various sea conditions, providing a level of confidence that is hard to replicate without years of trial and error.

Advantages of custom tailored boats

A custom tailored sailboat offers unparalleled flexibility because it is built specifically around the unique requirements of the owner rather than a generalized average. While pre-designed boat plans are excellent for standard needs, bespoke designs allow you to dictate every nuance of the vessel's geometry and functionality.

Personalized Size and Proportions

One of the primary advantages of a custom tailored sailboat is the ability to define exact dimensions that fit your lifestyle. If you need a specific beam width for stability or a particular length to navigate narrow rivers, a custom design ensures no space is wasted on features you don't use.

  • You can adjust the waterline and hull shape to prioritize either speed, cargo capacity, or interior volume.
  • Custom designs allow for unique "over-length" bows or sterns to accommodate specific fishing gear or seating arrangements.
  • The yacht design process for a custom boat ensures that every square inch of the hull serves a deliberate purpose.

Material and Construction Choices

When you opt for a bespoke build, you are not limited by the material choices dictated by a standard plan. You can select the construction method that best suits your climate, budget, and desired maintenance level.

  • You can choose between traditional wood, modern fiberglass, aluminum, or carbon fiber based on your performance goals.
  • Custom tailoring allows for hybrid constructions, such as a wooden cabin atop a fiberglass hull to balance aesthetics and durability.
  • Specific material choices can be made to reduce weight in areas where speed is critical while using heavier materials where stability is needed.

Optimized Performance and Utility

A custom tailored sailboat allows for precise "tuning" of the boat's performance characteristics. Instead of accepting a design that is "fast enough," you can engineer a hull to excel in specific conditions, such as heavy chop or light winds.

  • You can tailor the sail plan and keel shape to match your preferred sailing style, whether it be racing-focused or cruising-heavy.
  • Interior layouts can be customized to include specific amenities like a larger galley, a dedicated reading nook, or a custom storage locker.
  • Bespoke designs allow for unique architectural flourishes that give the boat a distinct personality and visual appeal.

Cost and time differences

When comparing pre-designed boat plans to a custom tailored sailboat, the most immediate differences appear in your initial investment and the total duration of the construction process. Pre-designed plans are built on the principle of economy of scale; because the designer has already solved the engineering puzzles, you can move straight into production. A custom tailored design requires an upfront investment in the "discovery" phase, where every curve, mast height, and hull shape is debated before a single plank is laid.

Budgetary Breakdown

Pre-designed boat plans are generally more affordable for the DIY builder or small shipyard. Since the geometry is fixed, you benefit from standardized components and predictable material requirements. You can often estimate your total cost with high accuracy because the "design fee" is already baked into the price of the plans.

In contrast, a custom tailored sailboat involves higher initial costs but offers greater control over the final result. You are paying for specific needs—such as a unique hull shape to handle specific coastal conditions or a specialized interior layout for a long-distance voyager. While the "per-square-foot" cost of construction might be similar, the variety of variables in a custom build can lead to more frequent adjustments during the building process.

Construction Timeline

Time is often the biggest differentiator between these two paths. A pre-designed plan allows for a faster start because you can begin building almost immediately after selecting your design. The steps are clearly outlined, making it easier to manage progress and maintain momentum.

The yacht design process for a custom boat takes significantly longer at the beginning but may save time during the actual construction phase by eliminating "on-the-fly" decision-making. Because every detail is finalized in the planning stage, there is less guesswork when you are actually shaping the timber or laying the fiberglass. However, if you enjoy the creative journey of seeing a boat evolve from a blank page to a finished hull, the extra time spent on custom tailoring is often considered a rewarding investment.

Choosing the right sailboat plan

Choosing between pre-designed boat plans and a custom tailored sailboat depends primarily on your personal experience level and how much control you want over the final result. If you are a first-time builder looking to complete your project with as little guesswork as possible, pre-designed plans offer a reliable roadmap where every measurement is already calculated.

Evaluating Your Building Experience

Beginners often find comfort in ready to build boats because the design has been tested and refined by experts. These plans provide specific instructions for standard hull shapes and common sail configurations, allowing you to focus on mastering construction techniques rather than solving complex geometry problems. However, if you are an experienced builder or a naval architect at heart, a custom tailored sailboat allows you to make micro-adjustments that suit your specific preferences.

Defining Your Project Goals

Consider what the boat will actually do for you before selecting a plan type. If your goal is to build a versatile day sailer that can be launched quickly, a pre-designed plan ensures you get a proven hull that performs well in various conditions. If your primary goal is to create a unique vessel—such as a yacht designed specifically for long-distance cruising with your favorite furniture layout—the custom yacht design process is the better route.

Balancing Time and Creativity

Time management is another critical factor in your decision. Pre-designed plans are generally faster to execute because you can start building almost immediately after purchasing the set. Custom designs require a longer initial investment of time during the planning phase, but they result in a boat that is perfectly synchronized with your needs. Weighing your desire for a "perfect" unique vessel against the practical benefits of a proven design will help you select the right path.

Frequently Asked Questions

Which is cheaper for a first time boat builder?

For a first-time boat builder, pre-designed boat plans are generally the more affordable and accessible option. These ready to build boats provide a proven blueprint with established dimensions and specifications, reducing the risk of costly design errors. While a custom tailored sailboat offers unique personalization, it requires a larger investment in time and professional design expertise during the yacht design process.

Final Thoughts

Choosing between pre-designed boat plans and a custom tailored sailboat depends entirely on your specific goals, budget, and desired level of involvement in the building process. Pre-designed options offer a proven roadmap for those seeking efficiency, while custom designs provide a unique vessel perfectly matched to your lifestyle requirements. Understanding this sailboat plans comparison helps clarify whether you value the reliability of a tested design or the creative freedom of a bespoke yacht.

To get started on your journey, take one small step tonight by identifying your primary priority: do you want a boat that is ready to build now, or are you prepared to begin the long-term yacht design process?

Share:

Offshore Boat Plans for Custom Vessel Design

Understanding Offshore Boat Plans

Selecting the right offshore boat plans is the foundational step for anyone dreaming of navigating open waters with a vessel tailored to their specific needs. Many aspiring shipbuilders struggle to balance artistic vision with structural reality, often feeling overwhelmed by the sheer number of design choices available.

These blueprints serve as the comprehensive roadmap for your maritime journey, transforming a flat sketch into a three-dimensional masterpiece. They provide the essential dimensions, curves, and proportions required to ensure your vessel is both seaworthy and aesthetically pleasing.

In this guide, you will explore how to interpret these detailed marine vessel sketches and understand the nuances of custom boat building. We will examine everything from hull geometry to the functional differences between various sailboat design blueprints and powerboat layouts.

In this article:

Understanding Offshore Boat Plans

Offshore boat plans serve as the technical foundation for constructing vessels capable of navigating open waters beyond the protection of the coastline. These documents provide a comprehensive blueprint that translates a conceptual vision into measurable dimensions and geometric shapes.

For various types of sea vessels, these plans act as a multi-dimensional map. They define the hull's curvature, the internal volume of the cabin, and the specific placement of structural ribs. Whether you are building a rugged trawler or a sleek cutter, the plans ensure that every component aligns with the overall hydrodynamic goals.

In the realm of sailboat design blueprints, these plans detail the intricate relationship between the mast height, keel depth, and sail area. They help builders understand how wind forces will translate into forward motion while maintaining stability in heavy swells. For these vessels, the plans must account for both aesthetic grace and functional balance.

When looking at a powerboat layout, the focus shifts toward engine placement, fuel tank capacity, and seating ergonomics. These sketches allow builders to visualize how passengers will move through the space and how the machinery will be housed to minimize vibration. A well-executed layout ensures that every square inch of the deck serves a specific purpose.

Custom boat building relies heavily on the accuracy of these marine vessel sketches to maintain proportions during construction. They provide the necessary specifications for lamination, framing, and planking, allowing for consistent results across different scales. By following a structured plan, builders can troubleshoot potential spatial issues before the first piece of timber or fiberglass is even cut.

Key Components of Hull Design

Professional offshore boat plans provide a comprehensive anatomical breakdown of the vessel, ensuring that every structural element is accounted for before construction begins. These blueprints translate abstract ideas into tangible dimensions, allowing builders to understand how the various parts of the hull interact with the water and each other.

The Hull Profile and Shape

The primary component of any marine vessel sketch is the hull profile. This defines the outer shape of the boat, determining how it cuts through waves and handles different sea conditions.

  • Waterline: The specific line where the water surface meets the hull, which dictates the boat's buoyancy and depth.
  • Draft: The vertical distance between the waterline and the lowest point of the keel, influencing how deep the vessel sits in the water.
  • Beam: The maximum width of the hull at its widest point, providing stability and interior space.

Structural Framework

Beneath the surface, the structural framework provides the "skeleton" that supports the weight of the boat, passengers, and cargo. High-quality offshore boat plans detail these internal components to ensure durability in rough seas.

  • Keel: The backbone of the ship, providing longitudinal strength and preventing the vessel from sliding sideways.
  • Frames or Ribs: These are the transverse structures that give the hull its shape and support the outer skin.
  • Stringers: Longitudinal members that run along the length of the hull to prevent twisting and maintain structural integrity.
  • Bulkheads: Vertical walls that divide the interior into compartments, providing both structural rigidity and functional zones for storage or cabins.

The Deck and Finishing Elements

While the hull provides the foundation, the deck layout defines the usable surface area. These plans include details on how the "skin" of the boat is joined to the framework.

  • Gunwales: The upper edges of the hull which provide a sturdy grip for passengers and a mounting point for railings.
  • Stem and Stern: The front and rear points of the vessel, designed to handle the brunt of forward motion and trailing waves.

Comparing Sailboat and Powerboat Layouts

The primary distinction between sailboat and powerboat layouts stems from how they utilize space to accommodate their respective propulsion systems. While both types of vessel designs aim for functionality, the interior configuration must balance the mechanical needs of the engine or sails with the comfort of the crew.

Space Allocation in Sailboats

In a sailboat design blueprint, the layout is often dictated by the need to accommodate the mast, keel, and rigging. Because the wind provides the primary forward motion, the interior can be more modular, allowing for multi-purpose areas that change based on how much sail is deployed.

A significant portion of the deck and hull must account for the boom's swing and the movement of the sails. This often results in a cockpit designed for active maneuvering, where the crew has enough room to adjust lines and sheets while remaining seated or standing comfortably.

Space Allocation in Powerboats

Powerboat layouts prioritize streamlined flow and engine accessibility. Because an internal combustion engine provides steady thrust, the interior is often organized around a central "spine" where the machinery sits. This allows for a more consistent floor plan that remains relatively stable regardless of whether the boat is moving quickly or idling.

Engine-driven vessels typically feature a dedicated helm station with clear sightlines to the bow. The seating is usually arranged to maximize passenger capacity and ease of movement, as there are fewer "moving parts" like swinging booms to navigate around.

Comparing Interior Flow

When reviewing offshore boat plans, you will notice that sailboats often have a more "lived-in" feel with distinct cabins for sleeping and galley work. Powerboats frequently lean toward an open-concept layout that emphasizes social interaction and easy access to the surrounding water.

  • Sailboat Advantage: Offers versatile spaces that can be adapted for different tasks as the wind shifts.
  • Powerboat Advantage: Provides a predictable, ergonomic flow that makes it easier for passengers to move from one side of the vessel to the other.

Scaling Plans from Small to Large

Selecting the appropriate dimensions for your vessel requires a balance between functionality and the scope of your adventures. When reviewing offshore boat plans, you must consider how the physical footprint of the hull impacts both the comfort of the occupants and the performance of the craft in open water.

Matching Size to Voyage Length

The distance you intend to travel is a primary factor in determining your vessel's scale. Short-range coastal voyages often favor compact designs that are easier to maneuver in tight bays and require less fuel or energy per mile.

For long-distance ocean crossings, a larger hull provides the necessary stability and storage capacity to sustain life for weeks at a time. Larger vessels can better handle significant swells and heavy weather, providing a more stable platform when the horizon is wide.

Determining Crew Capacity

The number of people on board dictates the internal volume required for seating, sleeping quarters, and movement. A boat that feels spacious with two people may become cramped and chaotic once a full crew joins the voyage.

Consider the "living" space versus "working" space during your planning phase. For instance, a small crew can focus on a streamlined layout where every square inch is utilized for efficiency, while a larger group requires dedicated zones to prevent collisions and noise interference.

Practical Scaling Considerations

  • Maneuverability - Smaller boats offer tighter turning circles and are easier to dock, making them ideal for solo sailors or small families.
  • Storage Volume - Larger vessels provide more room for heavy gear, provisions, and water tanks, which are essential for extended offshore expeditions.
  • Draft and Beam - Evaluate how the width and depth of the hull affect your ability to navigate shallow waters versus deep ocean trenches.

Common Mistakes in Boat Plan Selection

Selecting the right set of offshore boat plans is a foundational step that determines the success of your build. However, many builders encounter setbacks by choosing designs that lack clarity or fail to account for real-world construction needs.

Inconsistent Scaling and Dimensions

One frequent error occurs when the blueprints do not maintain a consistent scale throughout the entire design. If the hull dimensions are accurate but the interior cabin proportions feel squeezed, it can lead to confusion during the framing stage.

Builders should verify that measurements are provided for every major component. Without precise scaling, a small error in the initial sketch can multiply as you move from the 2D drawing to a 3D structure.

Missing Structural Details

Some plans focus heavily on the aesthetic silhouette of the vessel while neglecting the internal "skeleton." A common mistake is choosing a design that lacks specific details on rib spacing, keel thickness, or stringer placement.

If the plan does not specify how these components interlock, you may find yourself guessing during construction. High-quality marine vessel sketches should clearly indicate where structural reinforcements are required to handle offshore waves.

Overlooking Material Specifications

Choosing plans that do not specify compatible materials can lead to unexpected costs and design revisions. For example, a plan designed for heavy timber might behave differently if you attempt to build it using lightweight plywood or fiberglass.

Reviewing the intended material before committing ensures that your offshore boat plans align with your available tools and desired weight distribution. Always check if the blueprints include notes on wood species, laminate thickness, or metal gauges.

Neglecting Ease of Construction

A beautiful design is not always the most practical one for a DIY builder. Some complex powerboat layout options may require specialized joinery that can be difficult to execute without professional-grade machinery.

Evaluate whether the plan provides enough "breathing room" for assembly. A design that is too intricate might look stunning on paper but become overwhelming when you have to fit every piece into a physical workspace.

Frequently Asked Questions

What is included in a standard offshore boat plan?

Standard offshore boat plans provide comprehensive technical specifications for constructing a durable marine vessel. These include detailed sailboat design blueprints or powerboat layouts, precise measurements for hull geometry, and structural framing diagrams. Additionally, they offer essential marine vessel sketches, material lists, and step-by-step instructions to guide the custom boat building process from initial frame to finished deck.

Final Thoughts

Selecting the right offshore boat plans serves as the foundation for a successful maritime project. These blueprints provide the necessary structural integrity and aesthetic direction required for navigating open waters.

Key Takeaways

  • Structural Accuracy - High-quality plans ensure that the hull, keel, and deck are proportionally balanced for stability in various sea conditions.
  • Layout Versatility - Whether choosing a sailboat design blueprint or a powerboat layout, the interior configuration must align with your specific functional needs.
  • Scalable Design - Proper marine vessel sketches allow builders to scale designs accurately, maintaining consistency from small day boats to large ocean-going vessels.

Careful consideration of these components during the planning phase simplifies the custom boat building process and ensures a reliable final vessel.

Share:

Reading Boat Blueprints for Professional Wooden Boats

reading boat blueprints: Understanding boat plan scales and dimensions

Reading boat blueprints can feel like learning a new language when you first open up a set of complex wooden boat plans. For many enthusiasts and builders, staring at a sea of lines and symbols can be overwhelming, making it difficult to visualize how the final vessel will actually sit in the water.

Whether you are building your first skiff or planning a large sailing yacht, understanding these drawings is essential for accuracy. This guide will help you move past the initial confusion by breaking down the technical details into manageable steps.

You will learn how to navigate different types of nautical drawings and understand the specific boat plan scale used to maintain proportions. We will also explore common blueprint symbols and provide practical tips for interpreting complex views like plans, profiles, and sections. By the end, you will have the confidence to translate these 2D markings into a beautiful, three-dimensional wooden masterpiece.

In this article:

Understanding boat plan scales and dimensions

Understanding the boat plan scale is one of the most important skills when you begin reading boat blueprints. Because it is often impossible to draw a full-sized vessel on a single sheet of paper, scales allow you to represent a massive wooden hull in a manageable format.

A scale tells you the relationship between the measurements on your paper and the actual dimensions of the finished wood. For example, a 1:50 scale means that every inch on your blueprint represents 50 inches on the physical boat. Learning to translate these numbers ensures that your proportions remain accurate as you move from the drawing board to the shipyard.

How to interpret common scales

Most wooden boat plans use a ratio system to help builders visualize the final product. You should look for a scale bar or a numerical ratio, usually found in the corner of the blueprint.

  • A small scale (like 1:100) is excellent for seeing the entire boat's silhouette at a glance.
  • A large scale (like 1:5) is better for looking at specific details, such as the curve of a single rib or the shape of the stem.
  • Medium scales are often the "sweet spot" for general construction and layout planning.

To translate these measurements accurately, you can use a ruler to measure a specific line on the paper and then multiply it by the scale factor. If your blueprint is at 1:20 and you measure a section as 4 inches long, that piece of wood will actually be 80 inches long in reality.

Practical tips for accurate dimensions

Accuracy is vital because even a small error on paper can lead to significant mistakes when cutting your timber. Always double-check the scale before you start marking your wood.

  • Use a boat plan scale ruler if the drawings are not perfectly proportional, as these rulers account for slight variations in the drawing.
  • Verify at least three different points on the blueprint to ensure your math is consistent across the entire layout.
  • Remember that some parts of a boat may be drawn "to scale" while others, like small hardware or decorative carvings, might be drawn slightly larger to make them easier to see.

Common symbols in nautical drawings

Understanding the visual language of reading boat blueprints starts with recognizing standard markings. Just as words form sentences, these symbols provide the shorthand needed to communicate complex structural details without cluttering the page.

Identifying Joints and Connections

When you are looking at wooden boat plans, knowing how two pieces of timber meet is essential. Blueprints use specific marks to indicate whether a joint is butt-joined, mitered, or overlapped.

  • A simple line intersecting another often represents a basic meeting point between two structural members.
  • Curved lines at the ends of straight beams usually indicate where a piece should be rounded off or tapered.
  • Small circles or dots can represent the center points for pegs, dowels, or bolts used to secure the frame.

Decoding Curves and Contours

Because boats are defined by their flowing shapes, interpreting nautical drawings requires a keen eye for curve symbols. These marks tell you how much "bend" is required in a piece of wood.

  • Double lines often represent the thickness of a plank or the width of a keel section.
  • A dashed line frequently indicates a hidden edge, such as the underside of a hull that isn't immediately visible from the top view.
  • Small arrows on curved lines show the direction in which the wood should be bent or shaped during construction.

Material and Texture Markers

Standard blueprint symbols also help you distinguish between different types of materials at a glance. These markers ensure that you don't mistake a structural rib for a decorative trim.

  • Hatching patterns, or series of parallel lines, can indicate the grain direction of the wood or the density of the material.
  • Shaded areas often represent "bulk" sections, like where several layers of planking are joined together.
  • Specific icons may appear next to a line to denote a transition from one material, such as oak, to another, like teak.

Interpreting different views and projections

Understanding how to navigate different perspectives is one of the most important skills when reading boat blueprints. Because a wooden boat is a three-dimensional object, a single flat drawing cannot capture every detail at once. Instead, designers use various views and projections to show you exactly what each part looks like from different angles.

The Plan View

The plan view shows the boat as if you are looking down on it from directly above. In wooden boat plans, this is often called the "overhead" or "bird's-eye" view. It helps you understand the overall width and length of the hull, as well as how much deck space you have available.

The Elevation View

An elevation view shows the side profile of the boat, similar to looking at it from the water level. This is perhaps the most common way to visualize the shape of a boat's hull. It highlights the curve of the bottom, the height of the sides, and how the boat sits in the water.

The Profile View

While often used interchangeably with elevation, a profile view specifically focuses on the outline or silhouette of the vessel. In nautical drawings, this is your primary guide for seeing the "flow" of the design from bow to stern. It helps you visualize how the boat will move through waves.

The Sectional View

Sectional views are like taking a vertical slice through the boat, much like cutting a loaf of bread into slices. These drawings show what is happening inside the hull or beneath the surface of the wood. They are essential for understanding the thickness of the planking and the internal structure of the ribs.

Cross-Sections

A specific type of sectional view in boat building is the cross-section. This shows a "slice" of the boat at a specific point, such as exactly halfway between the bow and the stern. These views are vital for ensuring that the curvature of the wood remains consistent throughout the build.

Analyzing complex wooden boat plans

Navigating complex wooden boat plans requires a systematic approach to ensure you don't miss any structural details. Instead of looking at every line at once, try to view the blueprints as a chronological story of how the vessel is built from the bottom up.

Following the Construction Sequence

Begin your journey with the hull shape, which serves as the foundation for everything else. These drawings show the "skeleton" of the boat, highlighting the keel, ribs, and frames that provide structural integrity.

Once you understand the hull, move to the deck layout. This view helps you visualize how much space is available for seating, storage, and movement before you start adding heavy timber components.

Integrating Multiple Perspectives

To master reading boat blueprints, you must learn to connect different views simultaneously. For example, a specific rib on the side view will correspond to a precise point on the plan view.

Try following a single component through every drawing type:

  • Identify a frame in the profile view to see its height and curvature.
  • Locate that same frame in the plan view to see its width and spacing.
  • Check the cross-section view to understand how thick the timber should be at that exact point.

Visualizing the Final Form

Complex plans often include "stations" which are specific points along the length of the boat. By identifying these stations, you can see how the hull narrows or widens as it moves from the bow to the stern.

Take your time to trace the flow of the wood. Understanding how a curved plank on the hull meets the straight line of the deck will help you anticipate the challenges of the actual assembly process.

Common mistakes when reading blueprints

Mastering the art of reading boat blueprints requires more than just looking at the lines on the page; it requires a keen eye for detail. Many builders encounter frustrating hurdles because they overlook small but significant nuances in how the drawings are presented.

Misinterpreting the Scale

One of the most common mistakes occurs when you assume two different sections of wooden boat plans use the same scale without verifying it first. A mistake here can lead to a hull that is either far too large or much smaller than intended for the actual water.

Always check the boat plan scale provided in the legend before you begin your measurements. It is easy to glance at a beautiful drawing and forget whether you are looking at a full-scale layout or a simplified overview meant only for visual reference.

Confusion Over Orientation

Understanding which way the boat is facing is vital for accurate construction. A common error is failing to identify the "bow" (front) versus the "stern" (back) on a 2D drawing, which can lead to placing components in the wrong places.

When interpreting nautical drawings, it helps to look for small indicators like arrows or labels that show the direction of travel. If you lose track of the orientation, your structural ribs and planks might end up mirrored or rotated incorrectly during assembly.

Overlooking Blueprint Symbols

Skipping over the blueprint symbols can lead to missed instructions regarding materials or joints. Every tiny icon represents a specific piece of information, such as a curve radius or a thickness measurement that isn't explicitly written out in words.

To avoid these errors, take a moment to study the key or legend before you start building. Knowing what each stroke and dot means ensures that your construction matches the designer's original vision perfectly.

Frequently Asked Questions

What is the difference between a plan view and an elevation view?

A plan view shows you what the boat looks like from directly above, similar to looking at a map. It helps you understand the overall layout, width, and length of the hull. In contrast, an elevation view provides a side profile or "face" view, showing the height and vertical shape of the wooden boat as if it were standing upright.

Final Thoughts

Mastering the art of reading boat blueprints is a rewarding journey that turns complex nautical drawings into a clear roadmap for your next build. By understanding the specific scale, identifying common blueprint symbols, and learning to interpret different views, you gain the confidence to see the finished vessel before the first plank is even laid.

Keep these three key points in mind as you progress:

  • Scale and dimensions provide the precise proportions needed for accuracy.
  • Blueprint symbols act as a universal shorthand for construction details.
  • Consistent practice helps you transition from viewing lines to visualizing 3D structures.

To get started tonight, pick up your favorite set of wooden boat plans and simply try to identify three different views of the hull. Focusing on one small section at a time makes the entire process much less overwhelming.

Share:

Fiberglass Boat Molding Mistakes and Solutions

fiberglass boat molding: Understanding the molding process

Mastering fiberglass boat molding is one of the most rewarding yet challenging aspects of marine construction, but even experienced builders can find themselves frustrated by unexpected imperfections like air bubbles, uneven thickness, or a rough surface finish. Whether you are building a custom hull from scratch or repairing a small dinghy, understanding how the material behaves during the curing process is essential for achieving professional results. Small errors in the initial stages can compound quickly, leading to structural weaknesses or aesthetic flaws that are difficult to correct later.

In this guide, we will explore the most common pitfalls encountered during the molding process and provide practical solutions to keep your project on track. You will learn how proper mold preparation sets the foundation for success, how to choose the right resin types for your specific needs, and the best techniques for layering glass fibers efficiently. By addressing these frequent mistakes early, you can ensure a durable, high-quality boat with a smooth surface finish that lasts.

In this article:

Understanding the molding process

Fiberglass boat molding is the fundamental manufacturing process used to transform flat sheets of glass fibers and liquid resin into complex, durable marine structures. At its core, the process relies on a "mold," which acts as a negative space that defines the shape, size, and curvature of the final hull or deck. By pouring resin over layers of fiberglass within these molds, builders can achieve consistent geometry across multiple production runs, ensuring that every boat produced shares the same aerodynamic and hydrodynamic characteristics.

The process typically begins with a master mold, which is often made from high-quality materials like wood, plaster, or industrial-grade composites. The fiber glass layers are laid into this mold, where they conform to every contour of the surface. As the resin flows into the gaps between these fibers, it penetrates deep into the weave, bonding the strands together and creating a rigid composite material. This transition from a fluid state (resin) and a flexible state (glass fibers) into a solid, structural shell is what gives fiberglass boats their signature strength-to-weight ratio.

There are different methods of molding that dictate how the boat takes shape:

Hand Layup Molding

In this traditional method, workers manually place layers of fiber glass into a mold and apply resin using brushes or rollers. This allows for great artistic control and is ideal for custom-built boats where unique details are prioritized over high-speed production.

Spray Molding

This technique involves spraying a mixture of resin and chopped fibers (or mats) onto the surface of the mold simultaneously. It creates an even distribution of material, which is highly efficient for large hulls and helps eliminate air pockets that can weaken the structure.

Vacuum Infusion

By placing the fiberglass in a sealed mold and using a vacuum pump to pull resin through the fibers, this method ensures that every square inch of the boat is saturated. It results in a very consistent thickness and reduces the overall amount of resin needed compared to traditional hand layup.

The Importance of Mold Quality

The accuracy of the final boat depends entirely on the quality of the mold preparation. If a mold has minor imperfections, such as air bubbles or uneven surfaces, these will be mirrored perfectly in every boat produced. Therefore, ensuring the mold is polished and well-sealed is the first step toward achieving a professional surface finish.

Common mold preparation errors

Successful fiberglass boat molding depends heavily on how well you prepare your mold before the first layer of glass is laid down. One of the most frequent mistakes occurs when the mold surface is not perfectly clean or dry. Dust, fingerprints, and microscopic debris can create imperfections that become permanent features in the final hull. To ensure a professional result, every mold should be wiped down with a degreaser to remove oils and then dusted with a fine layer of release agent.

Air bubbles are another common hurdle during the initial stages of molding. If air is trapped between the glass and the mold surface, it results in "dry spots" where the resin hasn't fully saturated the fibers. You can avoid this by using a squeegee or a rolling pin to work out large pockets of air as you lay down each layer. Ensuring that your fiberglass layers are laid with consistent tension also prevents the fabric from bunching up, which is a primary cause of uneven surfaces.

Managing Moisture and Release Agents

Moisture is often an overlooked culprit in molding errors. If the mold surface is damp when you begin, it can cause the resin to cure unevenly or create tiny pits in the finish. Always ensure your mold is completely dry before application.

  • Apply a consistent layer of release agent to prevent the fiberglass from sticking permanently to the mold during the curing process.
  • Check for high spots on the mold by running your hand over it; even a small bump will create a noticeable protrusion in the final boat surface.
  • Ensure the fibers are oriented correctly, as twisting or overlapping the glass can lead to thick and thin areas across the hull.
  • Use a wet-out technique where you apply resin gradually, allowing it to seep into the fibers rather than pouring it all on at once.

Resin and glass fiber issues

Achieving high-quality fiberglass boat molding requires a precise balance between the resin and the glass fiber layers. One of the most common issues beginners face is an incorrect resin-to-fiber ratio. If you use too much resin, the hull can become heavy, sluggish in the water, and prone to "pooling" where the excess fluid settles in low spots. Conversely, using too little resin leaves the fibers starved, resulting in a brittle structure that may lack the necessary strength to withstand waves or impact.

Identifying Dry Spots

A dry spot occurs when the glass fiber is not fully saturated with resin. These areas often appear as dull, matte patches on an otherwise glossy surface. They can cause structural weaknesses because the fibers aren't effectively bonded to one another, which limits the boat's ability to distribute tension across the hull.

  • Look for "fuzzy" areas where individual glass strands are visible and haven't been coated by the resin.
  • Check for uneven thickness, as dry spots often feel slightly more porous or rougher to the touch than saturated sections.
  • Ensure that you are rolling out enough resin to push air bubbles out of the weave, which is a primary cause of localized dryness.

Choosing the Right Resin Types

Selecting the wrong resin type for your specific boat project can lead to unexpected molding complications. For example, using a polyester resin when an epoxy resin was required might result in less structural integrity or a different expected finish. Different resins also have varying viscosity; if the resin is too thick, it may struggle to penetrate deep into dense glass fiber layers, leading to inconsistent molding results across large surfaces.

Techniques for a smooth finish

Achieving a professional surface finish in fiberglass boat molding requires attention to both the physical movement of the material during the layup and the final refinement steps. One of the most common challenges is managing wrinkles, which occur when the glass fibers are not laid down with enough tension or when air becomes trapped between layers.

Eliminating Wrinkles and Air Bubbles

To prevent wrinkles from forming during the initial layup, use a squeegee or a finishing brush to work the resin into every crevice of the fiber. This manual manipulation helps push out trapped air pockets that can create "dimples" in the final hull.

  • Use a ribbed roller to press down on the fiberglass layers, ensuring that each strand is compressed evenly against the mold surface.
  • Work from the center of the boat outward toward the edges to distribute tension uniformly and prevent the fibers from bunching up in one spot.
  • Apply resin in stages rather than all at once, allowing the fiber to "set" slightly before adding more material to avoid heavy pooling or sagging.

Ensuring Consistent Thickness

A consistent thickness is vital for both the structural integrity and the aesthetic appeal of the boat. Variations in wall thickness can lead to uneven weight distribution and unpredictable handling on the water.

  • Maintain a steady "wet-out" process by ensuring that every fiber strand is completely saturated with resin before adding the next layer.
  • Use a flat spreader tool for large flat surfaces to ensure the fiberglass layers lay perfectly flat without any high spots or low valleys.
  • Monitor the amount of resin used per square inch; too much resin can lead to a heavy, sluggish hull, while too little can leave the fiberglass feeling "dry" and brittle.

Refining the Surface Finish

The final appearance of the boat depends heavily on how well you manage the transition from wet molding to dry finish. Even with careful layup, a few techniques can elevate the smoothness of the hull.

  • Perform a "fairing" step by applying a thin layer of filler or putty over the molded surface to iron out minor imperfections and high spots.
  • Use a sanding block to create a uniform texture, moving from coarse grits to fine grits to achieve a mirror-like smoothness.
  • Check for "bridge" areas—places where the fiberglass might have slightly lifted off the mold—and press these down firmly with a heavy roller before the resin fully cures.

Final curing and inspection tips

Once the initial molding process is complete and the resin has hardened, the final curing stage determines the long-term durability of your boat. Even if the surface looks perfect initially, ensuring the material has fully cross-linked is essential for structural integrity. You should check that the fiberglass hull can withstand temperature fluctuations without warping or cracking.

Verifying Structural Integrity

To ensure the boat is structurally sound, perform a "tap test" by gently striking different areas of the surface with your knuckles. A clear, high-pitched ring indicates a solid bond between the resin and fiber glass layers, while a dull thud may reveal a pocket of air or an area where the laminate did not fully saturate.

  • Check for "dry spots" where the fiber glass layers did not receive enough resin to become fully saturated.
  • Inspect high-stress points, such as the keel and the bow, for any signs of delamination or separation between layers.
  • Verify that the mold release agent was removed completely so that the boat can be easily separated from its original shape without sticking.

Surface Finish Inspection

A high-quality surface finish is what separates a DIY project from a professional build. After the final cure, examine the hull under bright, direct light to identify any subtle imperfections that might have been missed during the molding phase.

  • Look for "pinholes," which are tiny air bubbles trapped on the surface during the resin flow.
  • Identify "washout" areas where the fiber glass may have shifted slightly, creating a wavy texture.
  • Check for consistent thickness across the entire hull to ensure even weight distribution and buoyancy.

Next Steps for Refinement

If you find minor surface flaws, they can often be corrected with light sanding or a thin layer of filler. For structural issues like large air pockets, you may need to perform a localized "spot repair" by adding more resin and fiber until the area is level with the rest of the hull.

Frequently Asked Questions

How do I get rid of air bubbles in fiberglass molding?

To eliminate air bubbles during fiberglass boat molding, ensure thorough mold preparation by applying a release agent and wetting the fibers consistently. Use a rolling technique to work out trapped air as you lay down each layer of fiber glass. For the best results, consider using a vacuum bagging system or a squeegee to press out remaining pockets of air before the resin sets.

Final Thoughts

Mastering fiberglass boat molding requires a balance of careful preparation, material selection, and patience during the curing process. By focusing on consistent mold preparation, choosing the right resin types for your project goals, and ensuring even distribution across all fiber glass layers, you can significantly reduce common defects like air bubbles or uneven thickness. These core elements transform a complex manufacturing task into a manageable DIY achievement.

To get started on your next build tonight, take a moment to sketch out the specific boat design you want to create and identify which resin type best suits your desired durability and weight requirements.

Share:

How to Customize Boat Plans for Your Personal Style

customize boat plans: Understanding standard boat plans

Learning how to customize boat plans is the first step toward creating a vessel that feels truly your own rather than one pulled straight from a catalog. Many aspiring builders start with a standard set of blueprints, only to realize they need more storage, a different seat arrangement, or a specific aesthetic touch.

Whether you are a seasoned woodworker or a beginner with "IKEA-level" skills, tailoring your design ensures the final product matches your lifestyle. In this guide, we will explore how to take those foundational drawings and transform them into a unique masterpiece. You will learn how to adjust hull shapes, refine the interior layout, and select the perfect materials to reflect your personal style.

In this article:

Understanding standard boat plans

Before you begin to customize boat plans, it is essential to understand what a standard plan actually provides. At its core, a boat plan is a comprehensive set of detailed drawings and instructional booklets designed to guide you through every stage of construction.

For beginners, these plans act as a roadmap that removes the guesswork from the building process. You do not need to be a master shipwright to start; many plans are designed for people with basic woodworking skills who can follow clear instructions and measurements.

A high-quality plan typically includes everything you need to build a functional vessel from scratch. This means you won't have to spend hours measuring or shaping parts on the fly because every detail is already accounted for in the drawings.

What to expect in a standard plan

Standard plans usually cover the fundamental structural components of the boat. These include detailed views of the hull construction, deck specifications, and overall proportions at various scales.

  • Structural Details: Most plans provide 1:1 or 1:2 scale drawings for every part of the structure to ensure accuracy during assembly.
  • Hardware Specifications: You will find specific details for sailing hardware, including the mast, boom, standing rigging, and sails.
  • Steering Systems: Plans often include detailed layouts for the rudder, tiller bar, and gudgeons so you know exactly how your boat will move.
  • On-board Systems: Complete plans account for "hidden" features like fuel systems, electrical wiring, freshwater storage, and bilge systems.

For experts, these base plans serve as a sophisticated foundation to build upon. While a beginner might follow the plan exactly as written, an experienced builder uses the plan as a starting point to tweak proportions or swap out specific components.

Identifying your personal style needs

Before you pick up a pencil to customize boat plans, you must first define what your vessel will actually do on the water. A boat designed for solo fishing will feel very different from one built for hosting family dinners or navigating choppy coastal waves.

Defining Primary Function

Start by asking yourself how much time you plan to spend on the water and what activities are most important. Do you need a stable platform for paddleboarding, or do you want a sleek vessel that can handle high speeds?

  • Consider the environment, such as whether you will be exploring calm lakes, winding rivers, or open ocean swells.
  • Think about the number of passengers you expect to carry regularly and how much "elbow room" each person needs.
  • Determine if your priority is pure performance, like a fast racing boat, or maximum comfort for long-distance cruising.

Establishing Your Aesthetic

Your personal style also dictates the visual "personality" of the vessel. A wooden boat design can range from rugged and traditional to modern and minimalist depending on your taste.

  • Decide if you prefer a classic look, such as a vintage rowboat shape, or a contemporary profile with sharp lines.
  • Think about the "vibe" of the deck; do you want it to feel like an organized workshop or a cozy living room?
  • Consider how much of the hull structure you want to be visible versus hidden by a sleek deck and smooth finish.

Bridging Function and Style

The best custom designs happen when your practical needs meet your visual preferences. If you love the look of a wide, beamier boat but need it to be nimble, you can adjust the proportions within your wood boat blueprints.

  • Look for inspiration in existing boats that balance beauty with utility.
  • Create a mood board of colors, textures, and shapes that resonate with your personal style.
  • Write down three "must-have" features to ensure your final design stays true to your vision.

Modifying hull shape and size

When you start to customize boat plans, one of the most impactful changes you can make is adjusting the physical dimensions of the hull. The shape of your vessel determines how it handles the water, how much cargo it can carry, and even how it feels when you are sitting inside it.

Adjusting for Water Conditions

If you plan to sail in calm lakes, you might prefer a wider beam that provides stability and a smoother ride. Conversely, if you anticipate choppy coastal waters or ocean waves, you may want to customize boat plans to include a deeper draft or a sharper bow.

A sharper bow helps the boat slice through waves rather than bouncing over them, which can significantly improve your comfort during long journeys. You can also experiment with the length of the hull; a longer boat generally offers a more steady motion in open water.

Optimizing for Storage and Use

Your personal style often dictates how much "stuff" you need to carry on board. If you enjoy fishing, you might widen the stern area to accommodate more gear or a larger bait station.

For those who prioritize leisure, customizing boat plans to include a slightly flatter floor can make it easier to move around and arrange furniture. You can also adjust the overall length based on how much space you have available in your driveway or at your local marina.

Scaling Your Wood Boat Blueprints

Many wood boat blueprints allow for slight scaling, meaning you can increase or decrease the size of the entire design while keeping the proportions intact. This is a great way to ensure your custom boat layout fits your specific lifestyle without losing the original character of the design.

By taking the time to tweak these primary dimensions early on, you create a foundation that makes every subsequent detail—from the mast height to the seating arrangement—feel perfectly balanced.

Customizing interior layout and seating

When you begin to customize boat plans, the interior layout is often where your personal style shines brightest. Unlike the hull shape, which provides the foundation, the cabin space is what you experience every time you step on board. Adjusting these elements allows you to balance functionality with the specific way you plan to use the vessel.

Rearranging Cabin Space

Think about how you move within the boat and identify areas that feel cramped or underutilized. You can customize your space by expanding a sleeping area or creating a dedicated nook for reading and relaxation. Consider whether you prefer an open, airy feel or a cozy layout with distinct zones for different activities.

Bench Configurations for Comfort

The way you arrange your seating significantly impacts how much time you enjoy spending on the water. You can modify standard bench designs to better suit your physical needs and preferences. Here are some ways to approach these modifications:

  • Swap a traditional long bench for two smaller seats to create a more intimate conversation area.
  • Adjust the height of your seating to ensure it aligns perfectly with your preferred lounging posture.
  • Incorporate storage benches that offer both a place to sit and a hidden spot for gear.
  • Customize the width of your seats to accommodate different numbers of passengers comfortably.

Maximizing Every Inch

Small boats require smart spatial planning to ensure nothing feels wasted. By looking at wood boat blueprints, you can see where to tuck away small details like cup holders or tiny side tables. These minor additions make a huge difference in how organized and "homey" your custom boat layout feels during long voyages.

Choosing wood types and finishes

When you decide to customize boat plans, choosing the right timber is one of the most impactful decisions you will make. The wood you select determines not only the structural integrity of your vessel but also its final aesthetic character and how it feels under your hands.

Selecting Timber Species

Different wood species offer unique advantages depending on whether you prioritize durability or beauty. For example, some hardwoods are prized for their ability to withstand constant moisture and heavy use in the open water.

If you prefer a classic wooden boat design, you might look for grains that provide a rich, textured feel. Some woods offer a tight, uniform grain that looks modern and sleek, while others feature bold patterns that give the boat a more rustic, handcrafted appearance.

Matching Texture to Vision

Think about how you want the wood to interact with light and water. A smooth, polished surface can make a small boat feel elegant and sophisticated, whereas a slightly rougher texture can highlight the natural "personality" of each plank.

Consider these factors when reviewing your wood boat blueprints:

  • Hardwoods offer excellent stability and are often used for high-traffic areas like the cockpit or seating.
  • Softer woods are easier to carve and shape, making them ideal for decorative elements or intricate trim work.
  • Lightweight species can help reduce the overall weight of the hull, improving maneuverability in the water.

Choosing Your Finish

The finish is what protects your hard work from the elements while showcasing the wood's natural beauty. You can choose between a high-gloss varnish that creates a mirror-like surface or a matte oil that allows the texture of the grain to remain prominent.

A custom finish also allows you to play with color depth, ensuring your boat stands out on the water while reflecting your unique personal style.

Frequently Asked Questions

Can you change the hull shape without ruining the balance?

Yes, you can modify the hull shape as long as you consider how changes affect the overall center of gravity and buoyancy. When you customize boat plans to alter the hull, ensure your adjustments are proportional to maintain stability. Small tweaks to the bow or stern can significantly impact how the vessel handles in different water conditions.

Final Thoughts

Creating your own vessel is a rewarding journey of personal expression. By learning to customize boat plans, you move beyond choosing a pre-made design and begin crafting a ship that mirrors your unique lifestyle.

Key Takeaways

  • Think about how the hull shape and size will affect your desired speed and stability.
  • Prioritize a custom boat layout that maximizes your favorite areas, whether it is cozy seating or extra storage.
  • Select wood types and finishes that reflect your aesthetic preferences while fitting your climate.

You do not need to be a master shipwright to start this process today. Tonight, take one small first step by sketching a simple rough layout of your dream boat on a piece of paper.

Share:

From Scratch to Splash: Building a Fishing Boat the Easy Way

From Scratch to Splash: Building a Fishing Boat the Easy Way

Constructing a fishing boat, even a smaller vessel, might seem an insurmountable task for the novice builder. However, with careful planning, appropriate resources, and a methodical approach, the process can be surprisingly manageable. This comprehensive guide outlines the steps involved in building a functional fishing boat from the ground up, emphasizing ease of construction and accessibility for amateur boat builders.

Phase 1: Design and Planning

Before any construction begins, a thorough design and planning phase is crucial. This phase sets the foundation for the entire project, determining the boat's success and minimizing costly mistakes later on. Rushing this stage often leads to significant problems down the line.

1.1 Defining Requirements and Specifications

The initial step involves clearly defining your needs and expectations for the boat. Consider the following factors:

  • Boat Length and Beam: Determine the ideal size based on your fishing needs, intended water conditions, and storage capabilities. Smaller boats are simpler to build but offer less space and stability.
  • Hull Type: Selecting the appropriate hull type is vital. A simple flat-bottomed hull is easier to construct than a more complex V-hull or displacement hull. However, V-hulls offer superior performance in rough waters.
  • Material Selection: The choice of material significantly impacts the construction process and the boat's longevity. Marine-grade plywood is a popular choice for its affordability and ease of workability, while fiberglass offers superior durability but requires more specialized skills and equipment.
  • Power System: Decide whether the boat will be powered by an outboard motor, an inboard motor, or be a non-motorized rowboat. Outboard motors are generally simpler to install and maintain.
  • Intended Use: Consider the specific type of fishing you will undertake. This influences factors like deck layout, storage space, and the inclusion of features such as rod holders or livewells.

1.2 Selecting Suitable Plans

Once the specifications are finalized, acquire detailed boat plans. Numerous reputable sources offer pre-designed plans for various boat types and sizes. These plans provide crucial dimensions, material lists, and step-by-step instructions. Ensure the chosen plans align precisely with your requirements and skill level. Consider purchasing plans from established boat building suppliers to ensure accuracy and completeness.

1.3 Gathering Materials and Tools

A comprehensive material list is essential. Accurate quantities of wood, fasteners, epoxy resin, fiberglass cloth (if applicable), paint, and other necessary components must be procured. Similarly, assembling the appropriate tools beforehand streamlines the construction process. Essential tools include:

  • Measuring and Marking Tools: Tape measure, square, pencil, marking gauge.
  • Cutting Tools: Circular saw, jigsaw, hand saw (for finer work).
  • Joining Tools: Clamps, screws, bolts, epoxy resin and hardener, caulking gun.
  • Finishing Tools: Sandpaper (various grits), paintbrushes, rollers.

Phase 2: Hull Construction

This phase forms the core of the boat-building process. Accuracy and precision are paramount to ensure the structural integrity and seaworthiness of the vessel.

2.1 Frame Assembly (if applicable)

For some designs, particularly those employing plywood, a frame or skeleton is constructed first. This provides a strong base for attaching the hull planks. Follow the plans meticulously, ensuring accurate measurements and secure joints. Properly attaching the frames provides the backbone of structural support for the boat.

2.2 Hull Planking

The hull planks are attached to the frame (or directly to each other in simpler designs). This requires careful attention to detail, ensuring proper alignment, tight joints, and secure fastening. Use marine-grade adhesives and fasteners to resist water damage and ensure durability. Proper planking is essential to create a watertight and robust hull.

2.3 Epoxy Coating and Fiberglass (optional)

For enhanced durability and water resistance, consider applying an epoxy coating to the hull. For increased strength and protection, fiberglass cloth can be added, layered with epoxy resin. This process requires careful attention to detail to avoid air bubbles and ensure a smooth, even finish. Fiberglass reinforcement significantly increases the boat's structural integrity and resistance to impacts.

Phase 3: Deck and Superstructure Construction

Once the hull is completed, focus shifts to the deck and any superstructure, such as a cabin or raised seating area. This phase requires precision and attention to detail to ensure a functional and aesthetically pleasing vessel.

3.1 Deck Construction

Construct the deck using the specified materials, typically plywood or fiberglass. Ensure a secure and watertight connection between the deck and the hull. This often involves using sealant and appropriate fasteners.

3.2 Superstructure (if applicable)

If your design includes a cabin or other superstructure, build it according to the plans. Pay close attention to waterproofing and structural integrity. The superstructure adds complexity to the construction but provides additional features and protection.

Phase 4: Finishing and Launching

The final phase involves refining the boat's finish, installing essential components, and preparing for the launch.

4.1 Finishing Touches

Sand the entire boat thoroughly to ensure a smooth surface. Apply several coats of marine-grade paint or varnish for protection against the elements. This step significantly contributes to the longevity and aesthetic appeal of the finished product.

4.2 Component Installation

Install essential components such as seats, oarlocks (if applicable), navigation lights, and any other desired features. Install the motor (if applicable) according to the manufacturer's instructions. Ensure all electrical components are properly wired and waterproofed.

4.3 Launching and Testing

Carefully launch the boat, following safety procedures. Test the boat thoroughly in calm waters to identify and rectify any issues before venturing into more challenging conditions. A thorough test run is critical to ensure seaworthiness and identify any potential problems.

Building a fishing boat from scratch is a demanding but rewarding endeavor. By following these steps, maintaining meticulous attention to detail, and prioritizing safety, even novice builders can achieve their goal of crafting a functional and durable vessel. Remember that consulting experienced boat builders or joining relevant online communities can provide invaluable support and guidance throughout the process.

Share:

Search This Blog

Powered by Blogger.

Pontoon Boat Plans for DIY Builders and Designers

Finding the right pontoon boat plans is often the first step toward transforming a simple vision of lake life into a tangible reality on t...

Labels

Recent Posts

Theme Support